How do I survey my first point, polyline or polygon in my project?
This article explains how to survey a point, polyline or polygon after you opened a project in the marXact UNI-Connect survey software.
By the way, interested in digital surveying?
Read more about our UNI-GR1, an RTK GNSS Receiver. Digital surveying and performing stakeouts is now easier than ever. Available in a complete package and ready to use worldwide. Want to know more? Click here
Follow marXact on social media
To begin surveying your first point, you need to start with opening the project. In case you don’t have one yet, see how to create a project here. When you have opened a project and – in case your accuracy matches your required accuracy as set in the project settings -, you are ready to survey your first point on the live map.
Once open, you need to select the object type you want to survey first.For a point: select the pinpoint icon to set a point. For a poly-line: select the polyline icon to set a line.For a polygon: select the polygon icon to make a polygon.
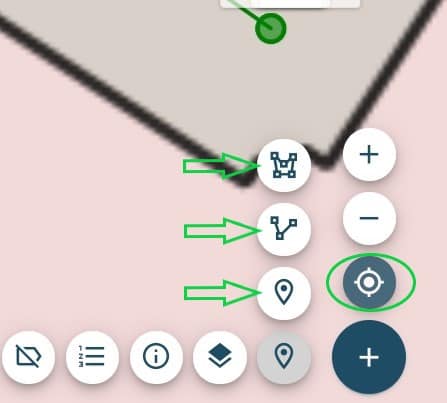
Once you have selected the right object type, you hit the big blue + button. Select the layer in the next screen and maybe an attribute if necessary and click “save”. You have now recorded your point or first point of a polyline or polygon.
In case you are surveying a poly-line or polygon, simply move towards your next point and hit the big blue + button again.
Tip: The circled icon is a GPS icon that will set a lock on your position in the live map. When you unlock it, you are free to look at other places in the live map.
Check out the tutorial video for a step-by-step instruction, starting at 10:30;